Follow me

subscribe twitter pinterest instagram instagram google plus flickr bloglovinr

Pages

Monday, November 19, 2012

Christmas Project!

For Daniel's side of the family, we've all decided to have everyone buy gifts for the children, but as for the adults we wanted to try something different. Instead of doing gifts for everyone, we thought to draw names out and have each of us just focus on one adult. Then we could get one significant, well-thought out, quality gift for someone. We made this decision last year at Christmas. Here we are and it's November of the next year already and I was given the task to figure out who would get who. SO based off of the traditional names in a hat idea, I made a little project out of it and thought I would share.

First, here is mostly what you need, I say mostly because I might have added a few extra things by the end of the project (after the photo was taken):
The Christmas banner was made by me in photoshop and I'll make it available for download. Also, not pictured above is another file you'll be able to download. Links will be later in the post.

Of course, there are many variations of this, so just go with what you have ;)
The first thing to do is coat your container/jar with an even layer of mod podge:

Then take your choice of glitter and dump some in the ready-to-go jar and over top the scrap paper you have laid down, you'll want to roll and tilt the jar to help spread the glitter:

Now set that upside down on the scrap paper to dry:

While it dries (I let it do so overnight, though I don't think it necessarily needs that long) write the names on the sticks. I alternated the red and green markers for the names:

The next day I came to a dried and clear jar coated in glitter!

This is when I added the banner, to do this I used sticky dot things haha

and here's the banner on the jar!
Click HERE for a .png version or HERE for a .jpg version of the banner to download 

This is the time where I had to decide what to use as a filler to hide the names and keep the sticks in place.
I played with many ideas. You can use marbles, rocks, sand, fake snow (maybe too light), buttons, beads, etc...
I went to Michael's and found these necklaces for a couple dollars and on top of that they were on sale.

Thinking these were perfect I dropped them in and thought I was done...not so fast. The sticks were hard to get in and it wasn't umm fluid? smooth? whatever. It just wasn't working for me like I wanted. SO I decided to cut them up into singles. It was perfect.
though, be safe when cutting these up. It can be mesmerizing and you don't want to cut yourself!!

Then after that I thought to make a card next to it. This just lets them know the "rules" since in my case it will be sitting out for people to grab on their own time. Here's what it looks like:
Click HERE to download it as a word file. Click HERE to download it as a PDF. 
Turns out the PDF is the only one that maintained the same font. I'm keeping the .docx one up though so you can download and edit it to your own fonts if you want. 

That's the END!! Hope you enjoyed it, I'd love to see your versions of it! Let me know if you try it!

Until Next Time!!

Saturday, November 10, 2012

Color Me Rad 5k


Saturday the 10th of November was the Color Me Rad 5k in Saint George, Utah and I had a blast doing it with a good family-friend Kristine
We came up with the team name: Tickle Me Pink. Inspired by crayola color names =>
This lovely team name was on the shirts we made...check it out, it's easy!

First off we had to go pickup our race packets and buy cool stuff!! 

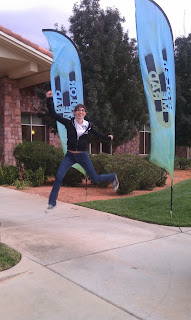
This process obviously requires jumping....for joy


Then race day was the next morning! It was so cold! We were just sitting in the car singing to the radio until we felt we really should line up with everyone else! hahaha

The first color bomb was blue...not my favorite color and I think it knows that....

I saw the lady grab a handful so I turned my head away, as I did that she tossed it right UP my nose!!! For real, no joke. I couldn't see or breathe for about a minute and for the rest of the race (and day) I had blue snot...so gross. hahaha 

As we continued on we eventually came to my favorite: PINK!!!

The finish wasn't far from there, then we joined up with the group where I was stuffing my face as the kiddos were attacking everyone with their color bombs!! Here's a few of us:


The two of us ran and got our photo taken by the pros and then took our own before heading to the car:

It was a good thing that I loved pink SO much, too....

After the excitement, I went home and showered!! hahaha 
Here's the shirt they gave us in the race packet:

It was so much fun!! We learned from experience and next time we will be rockin' even harder =D


Until next time!

Color Me Rad T-Shirts

We made awesome shirts for the Color Me Rad 5k and I thought I'd share them with you!!
First, of course you need your shirt! I love the poly/cotton workout shirts from Target, but whatever floats your boat.
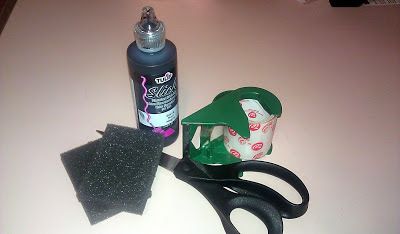
Then you need supplies:
fabric paint, scissors, tape, foam/sponges, and of course your shirt!

Then you need to cut the tape into letters or designs, now this effect could also be achieved using a stencil or cutting paper. I just love the cleaner effect the tape has...though I had to cheat on my e's and use punch outs from my scrapbook collection. 
Next you want to squeeze some paint into a paper plate or something and begin dabbing your sponge-thing in it and blotting over top your taped letters! OH AND DON'T FORGET THE CARDBOARD!! I forgot to add in the supplies a cardboard of some type, you need this to sit inside your shirt so your paint doesn't bleed through the back of it!!!
Sorry I don't have any detailed pictures, I decided to share this AFTER I made the shirt =P
Anyway, after you've covered around all the letters making sure to get every edge for greater definition, then you let it dry. It honestly doesn't take very long, maybe an hourish..
You then will remove the tape and ta~da you're done!!
Notice how the punched out e's don't look nearly as awesome as the taped letters do. 
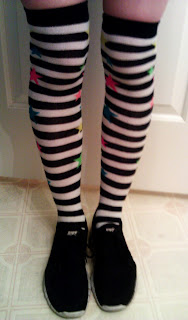
Then add your favorite pair of knee high socks and your "RAD" tattoo and you're ready to rock!!

Until Next Time!!